Integrate with your shop.
Accept bank transfers, Bitcoin, Ethereum, and more than 160 other cryptocurrencies with our ecommece crypto payment solution. Start accepting
payments and get paid in USD.
Do you deploy payment processing solutions for other businesses? Check out our Technology Partner Program today.
How to Install the WooCommerce Plugin

STEP 1
Download WooCommerce Plugin
Click the button below to download the RocketFuel WooCommerce cryptocurrency and bank transfer payment gateway plugin.

STEP 2
Install Plugin on Your WooCommerce Store
- Login to your shop’s admin panel.
- Ensure you have already installed and configured WooCommerce.
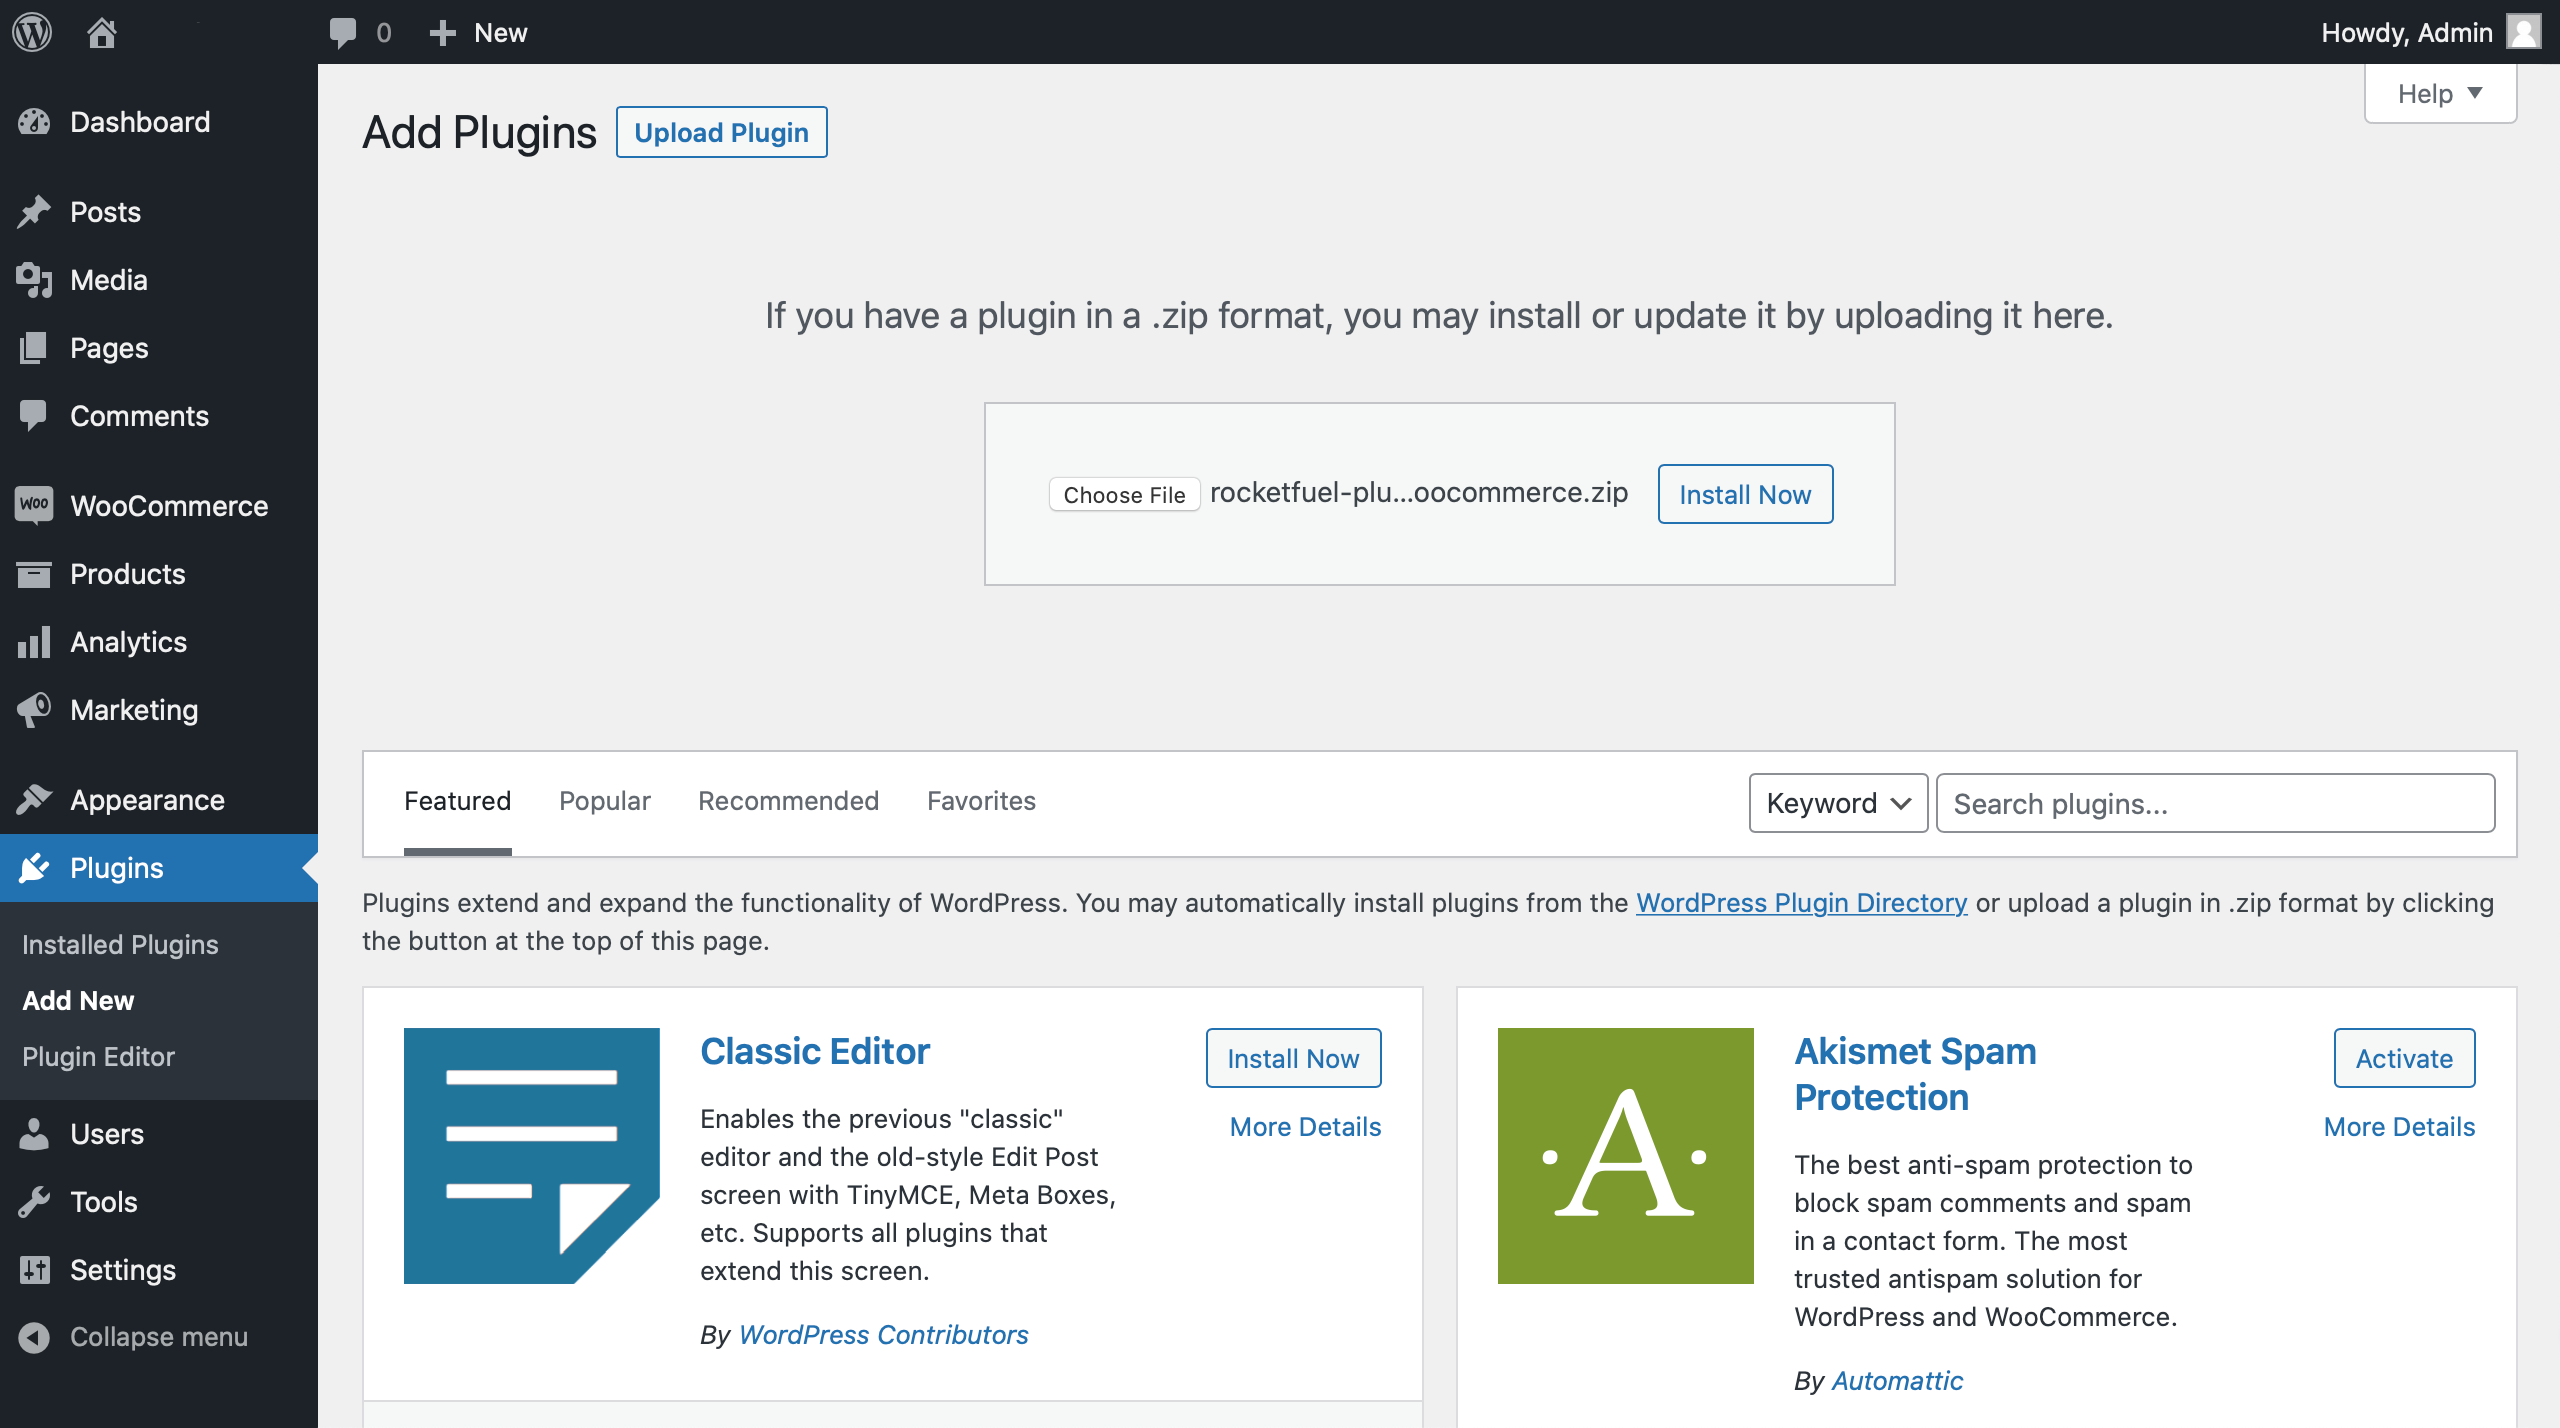
- Go to “Plugins” -> “Add Plugins”.
- Click the “Upload Plugin” button select RocketFuel plugin for WooCommerce zip file that you downloaded above.
- After installation activate plugin.

STEP 3
Configure Your RocketFuel Merchant Account Information
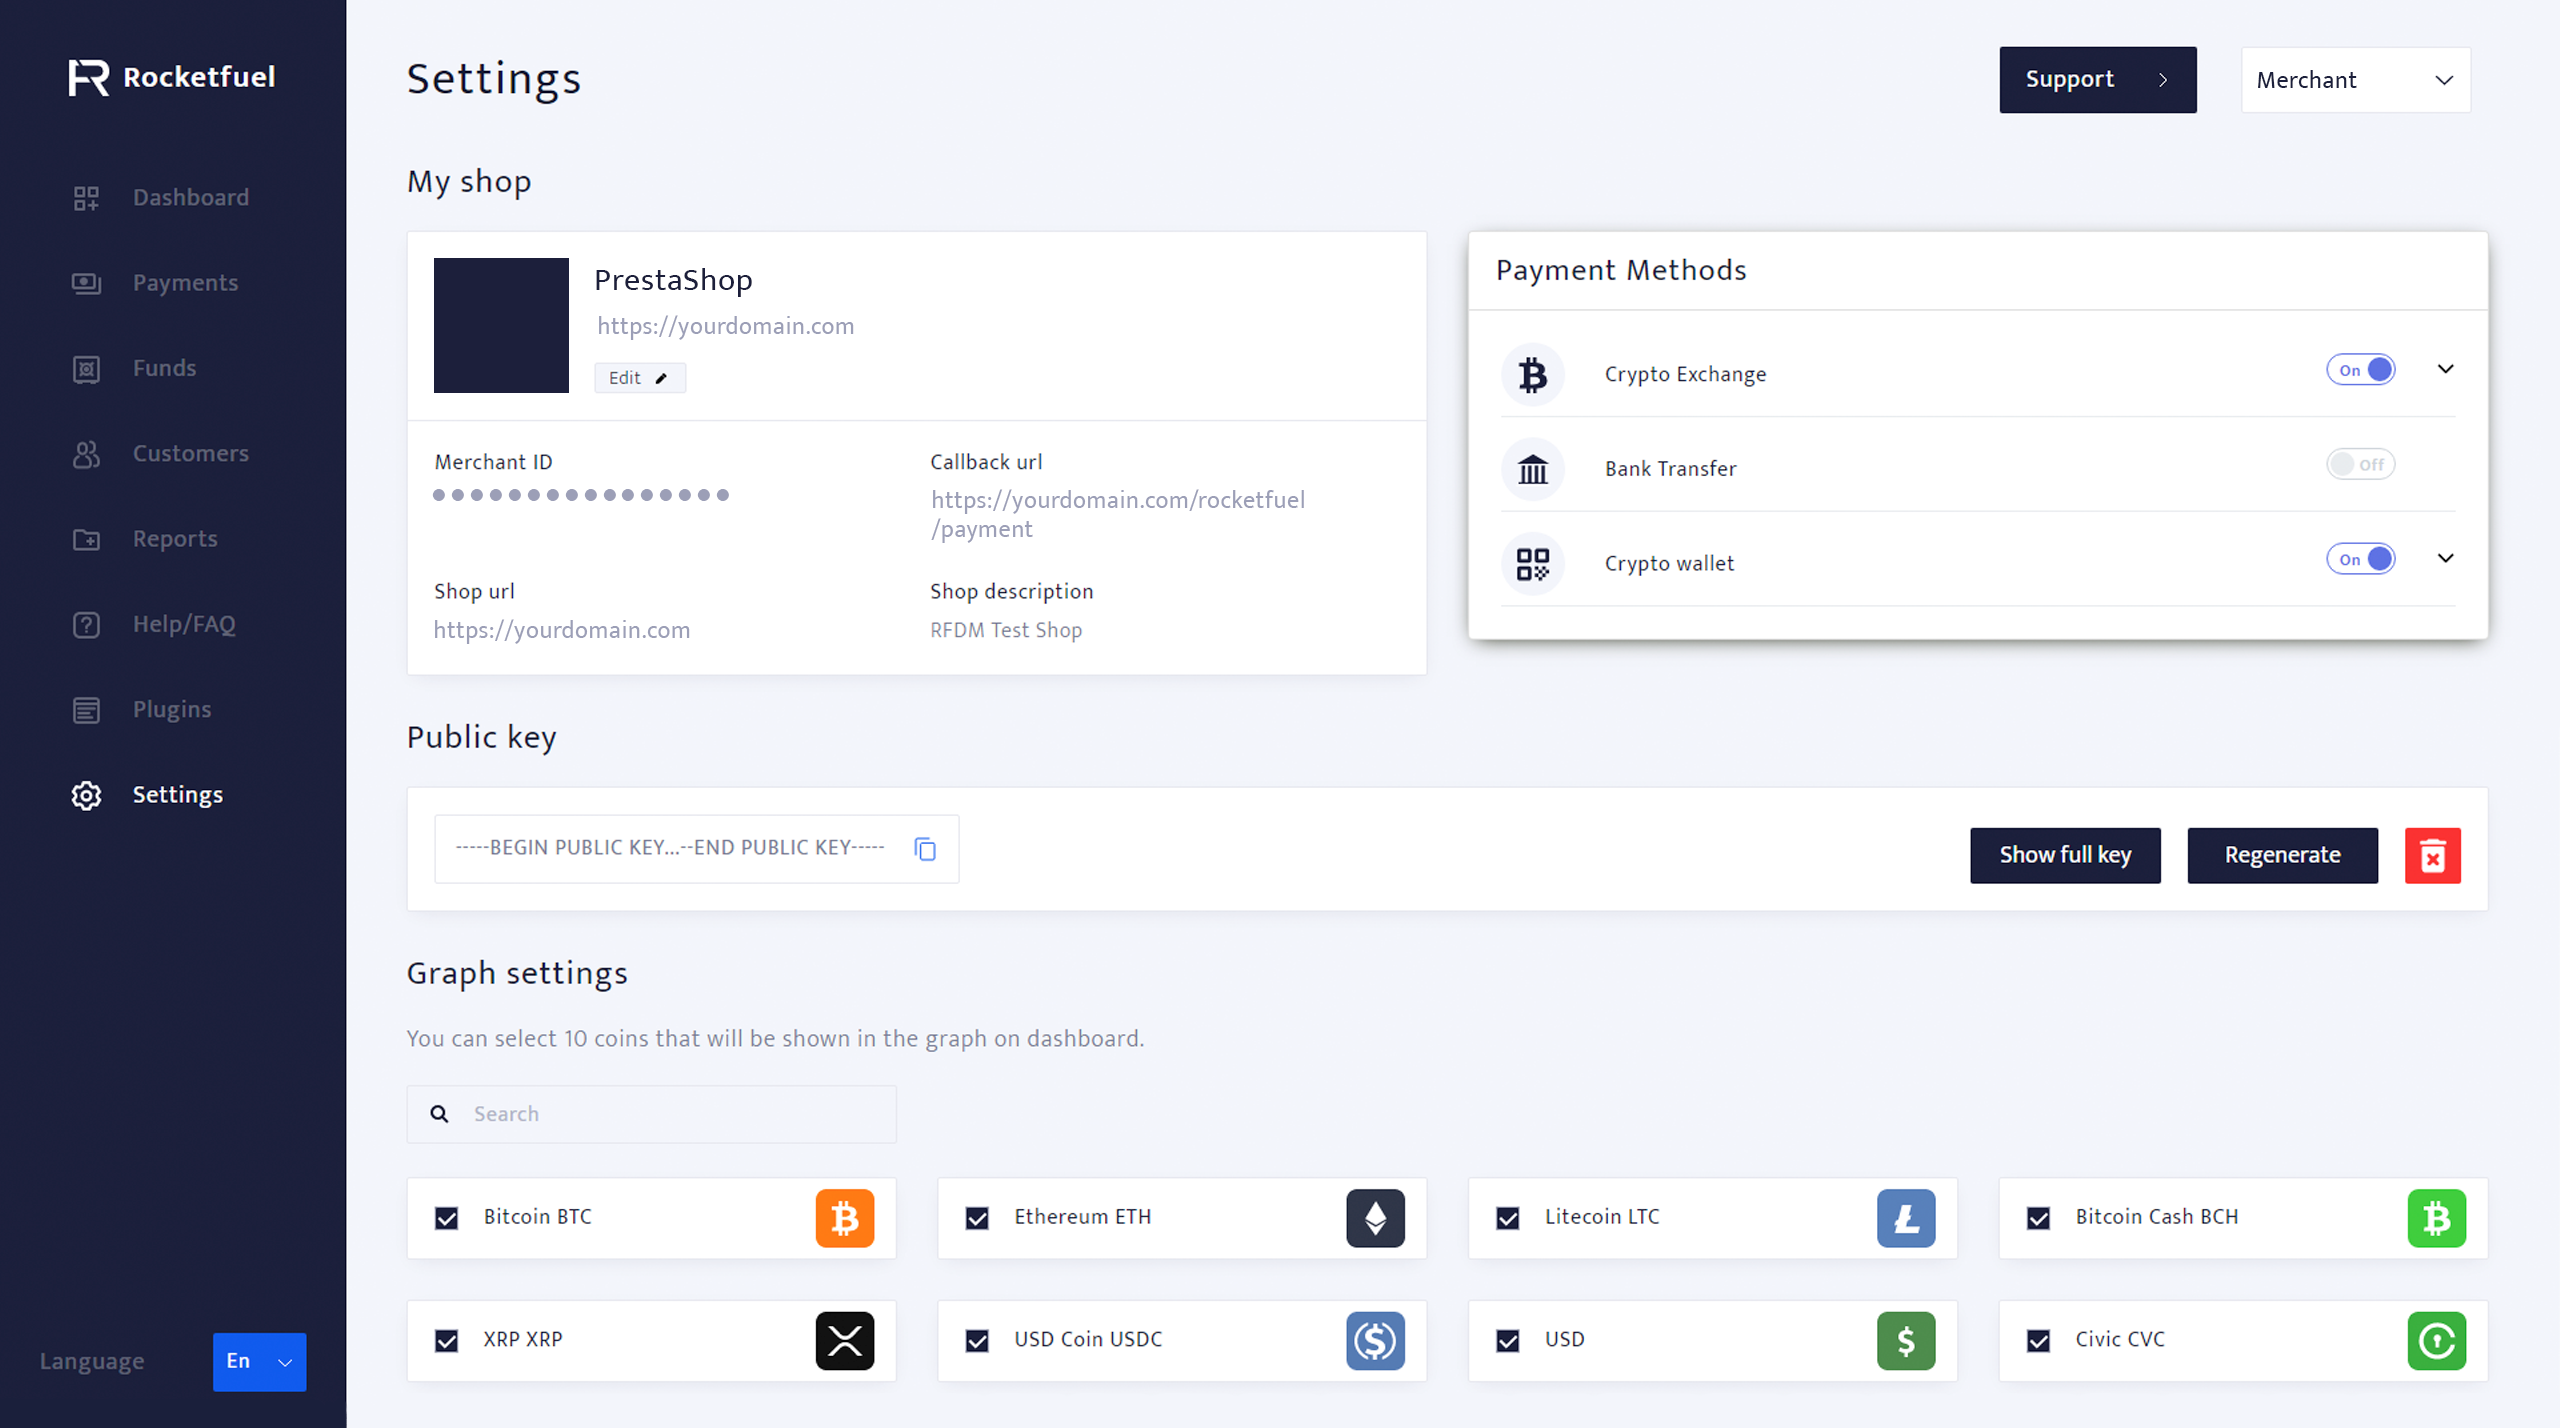
- Login to your RocketFuel Merchant Dashboard and go the the Settings page.
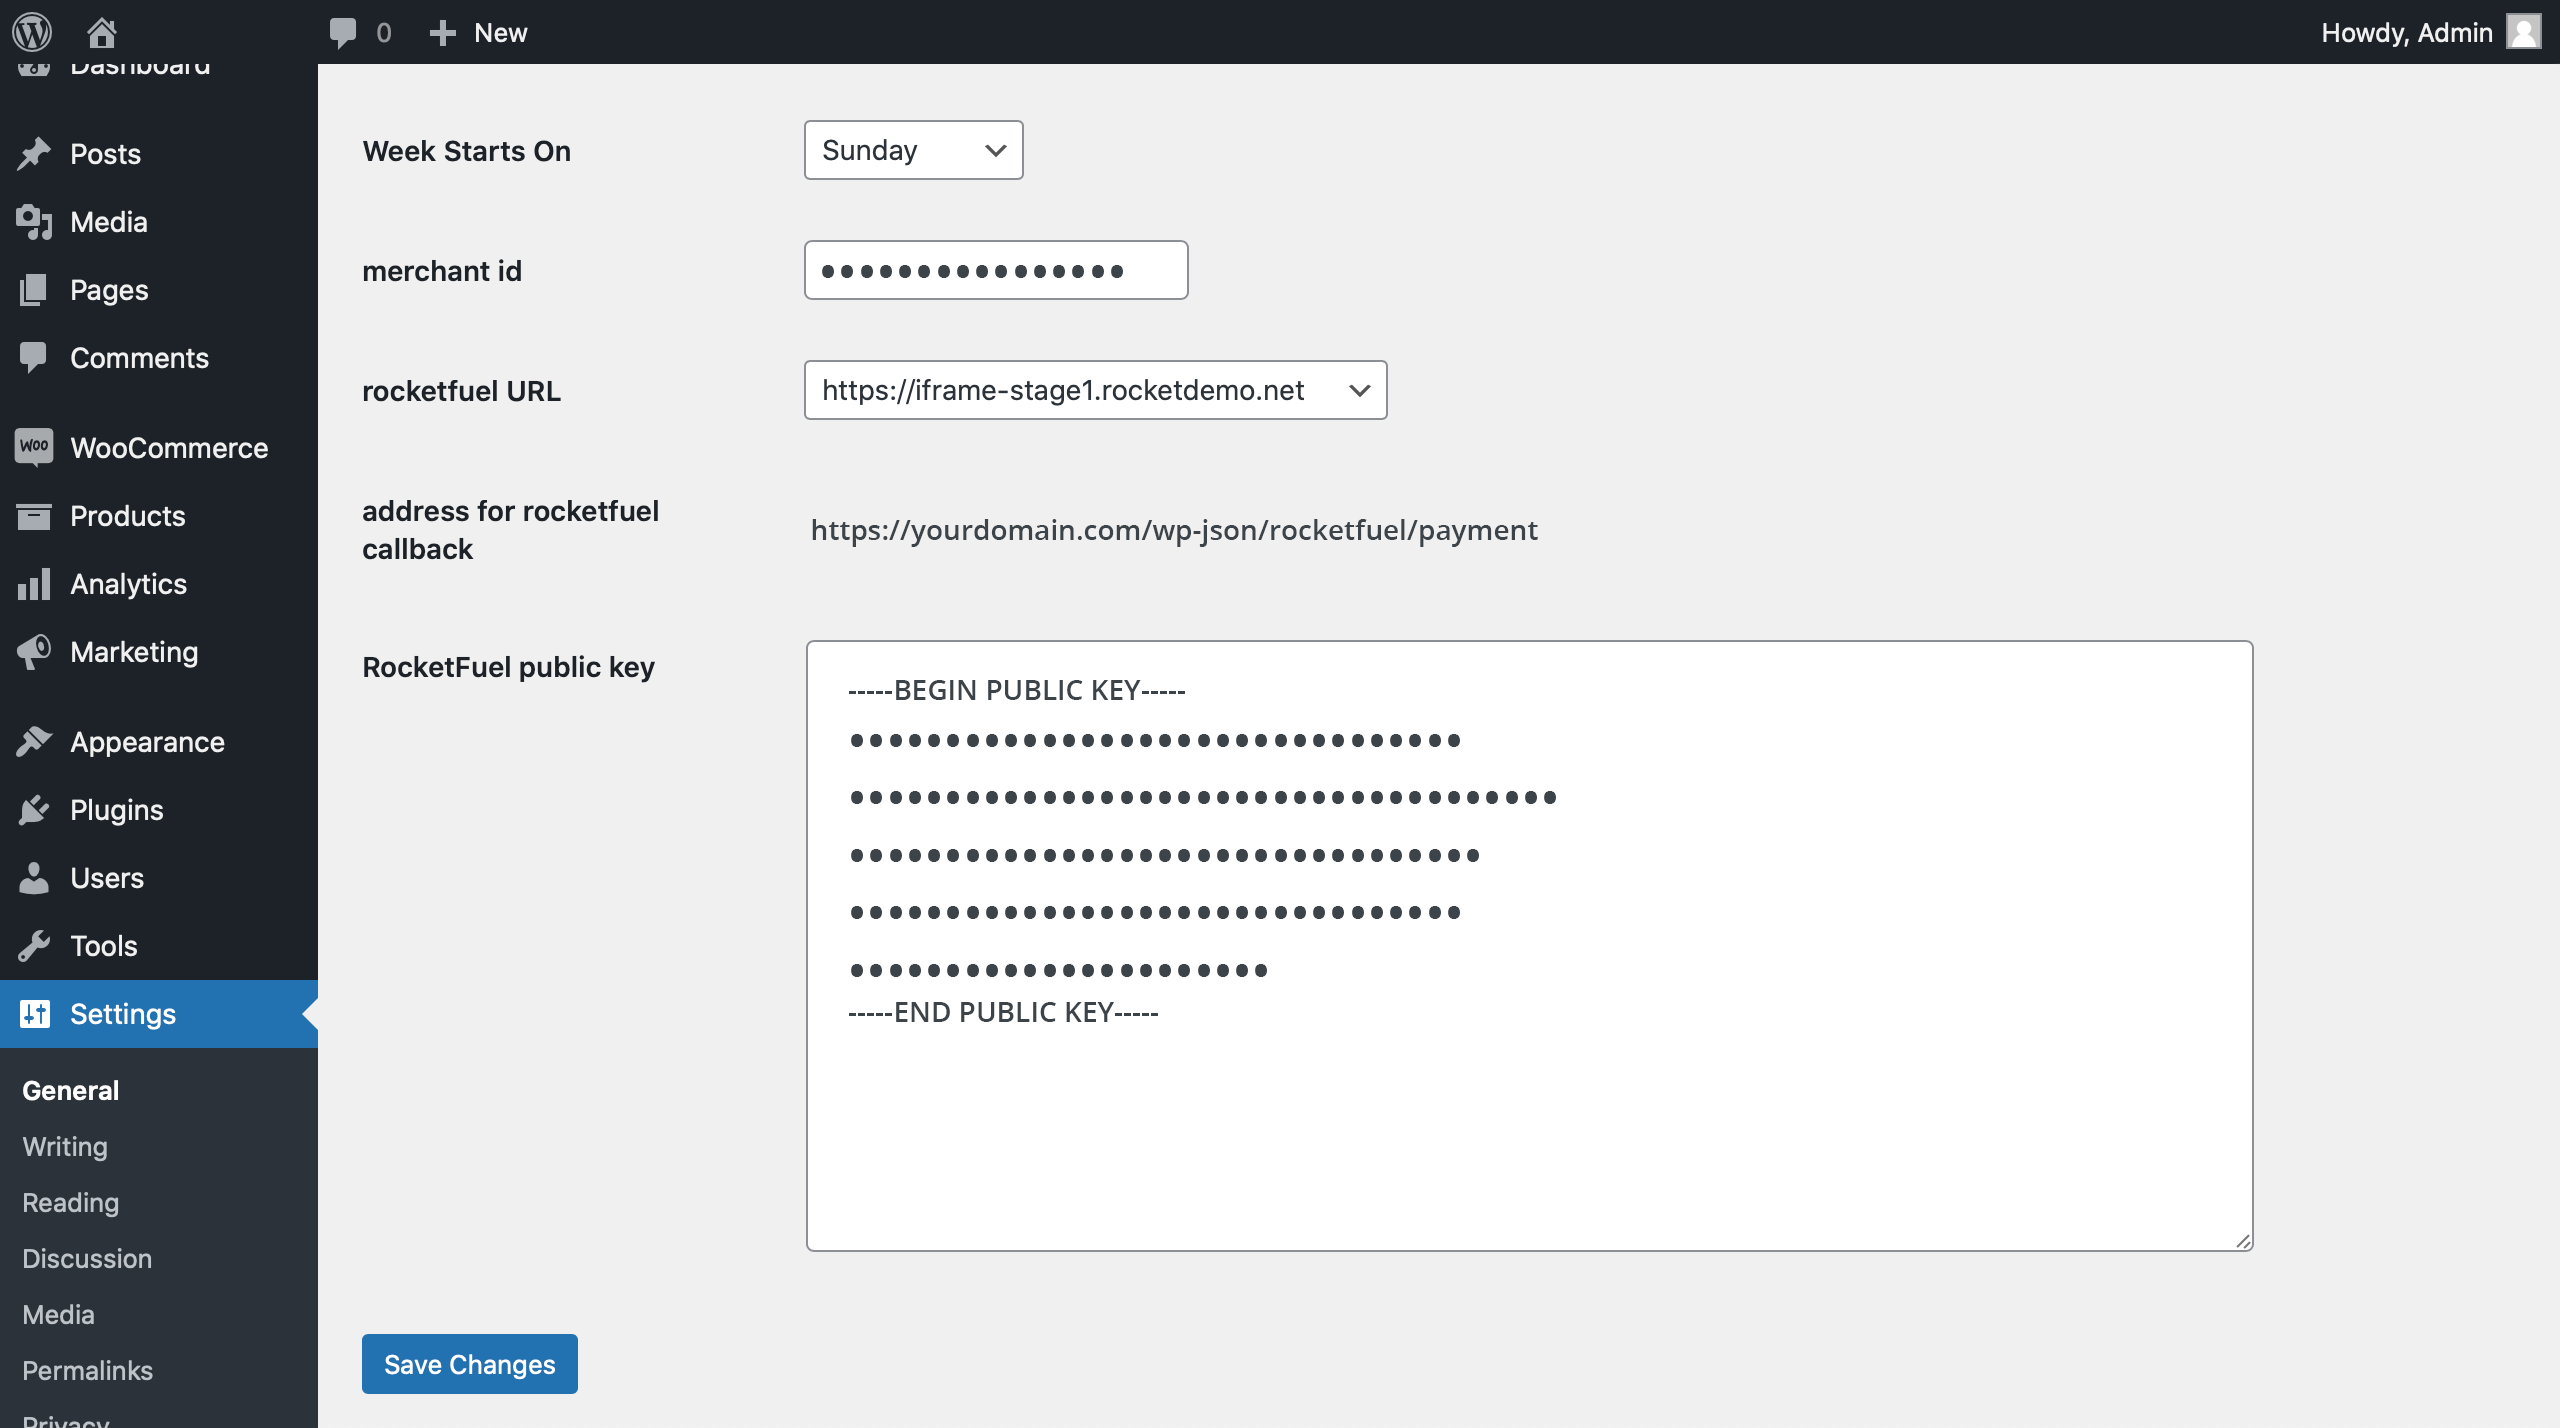
- Copy your “Merchant ID”, and “Public Key” from your Merchant Dashboard into the appropriate fields in your stop’s Admin Panel Settings -> General page.
- Copy the “Address for RocketFuel Callback” from the Settings page and save it to your RocketFuel Merchant Dashboard’s Settings page.
- Set the Rocketfuel URL to “https://iframe-stage1.rocketdemo.net” in your stop’s Settings page.

How to Install the PrestaShop Plugin

STEP 1
Download PrestaShop Plugin
Click the button below to download the RocketFuel PrestaShop cryptocurrency and bank transfer payments plugin

STEP 2
Install Plugin on Your PrestaShop Store
- Login to your shop’s admin panel.
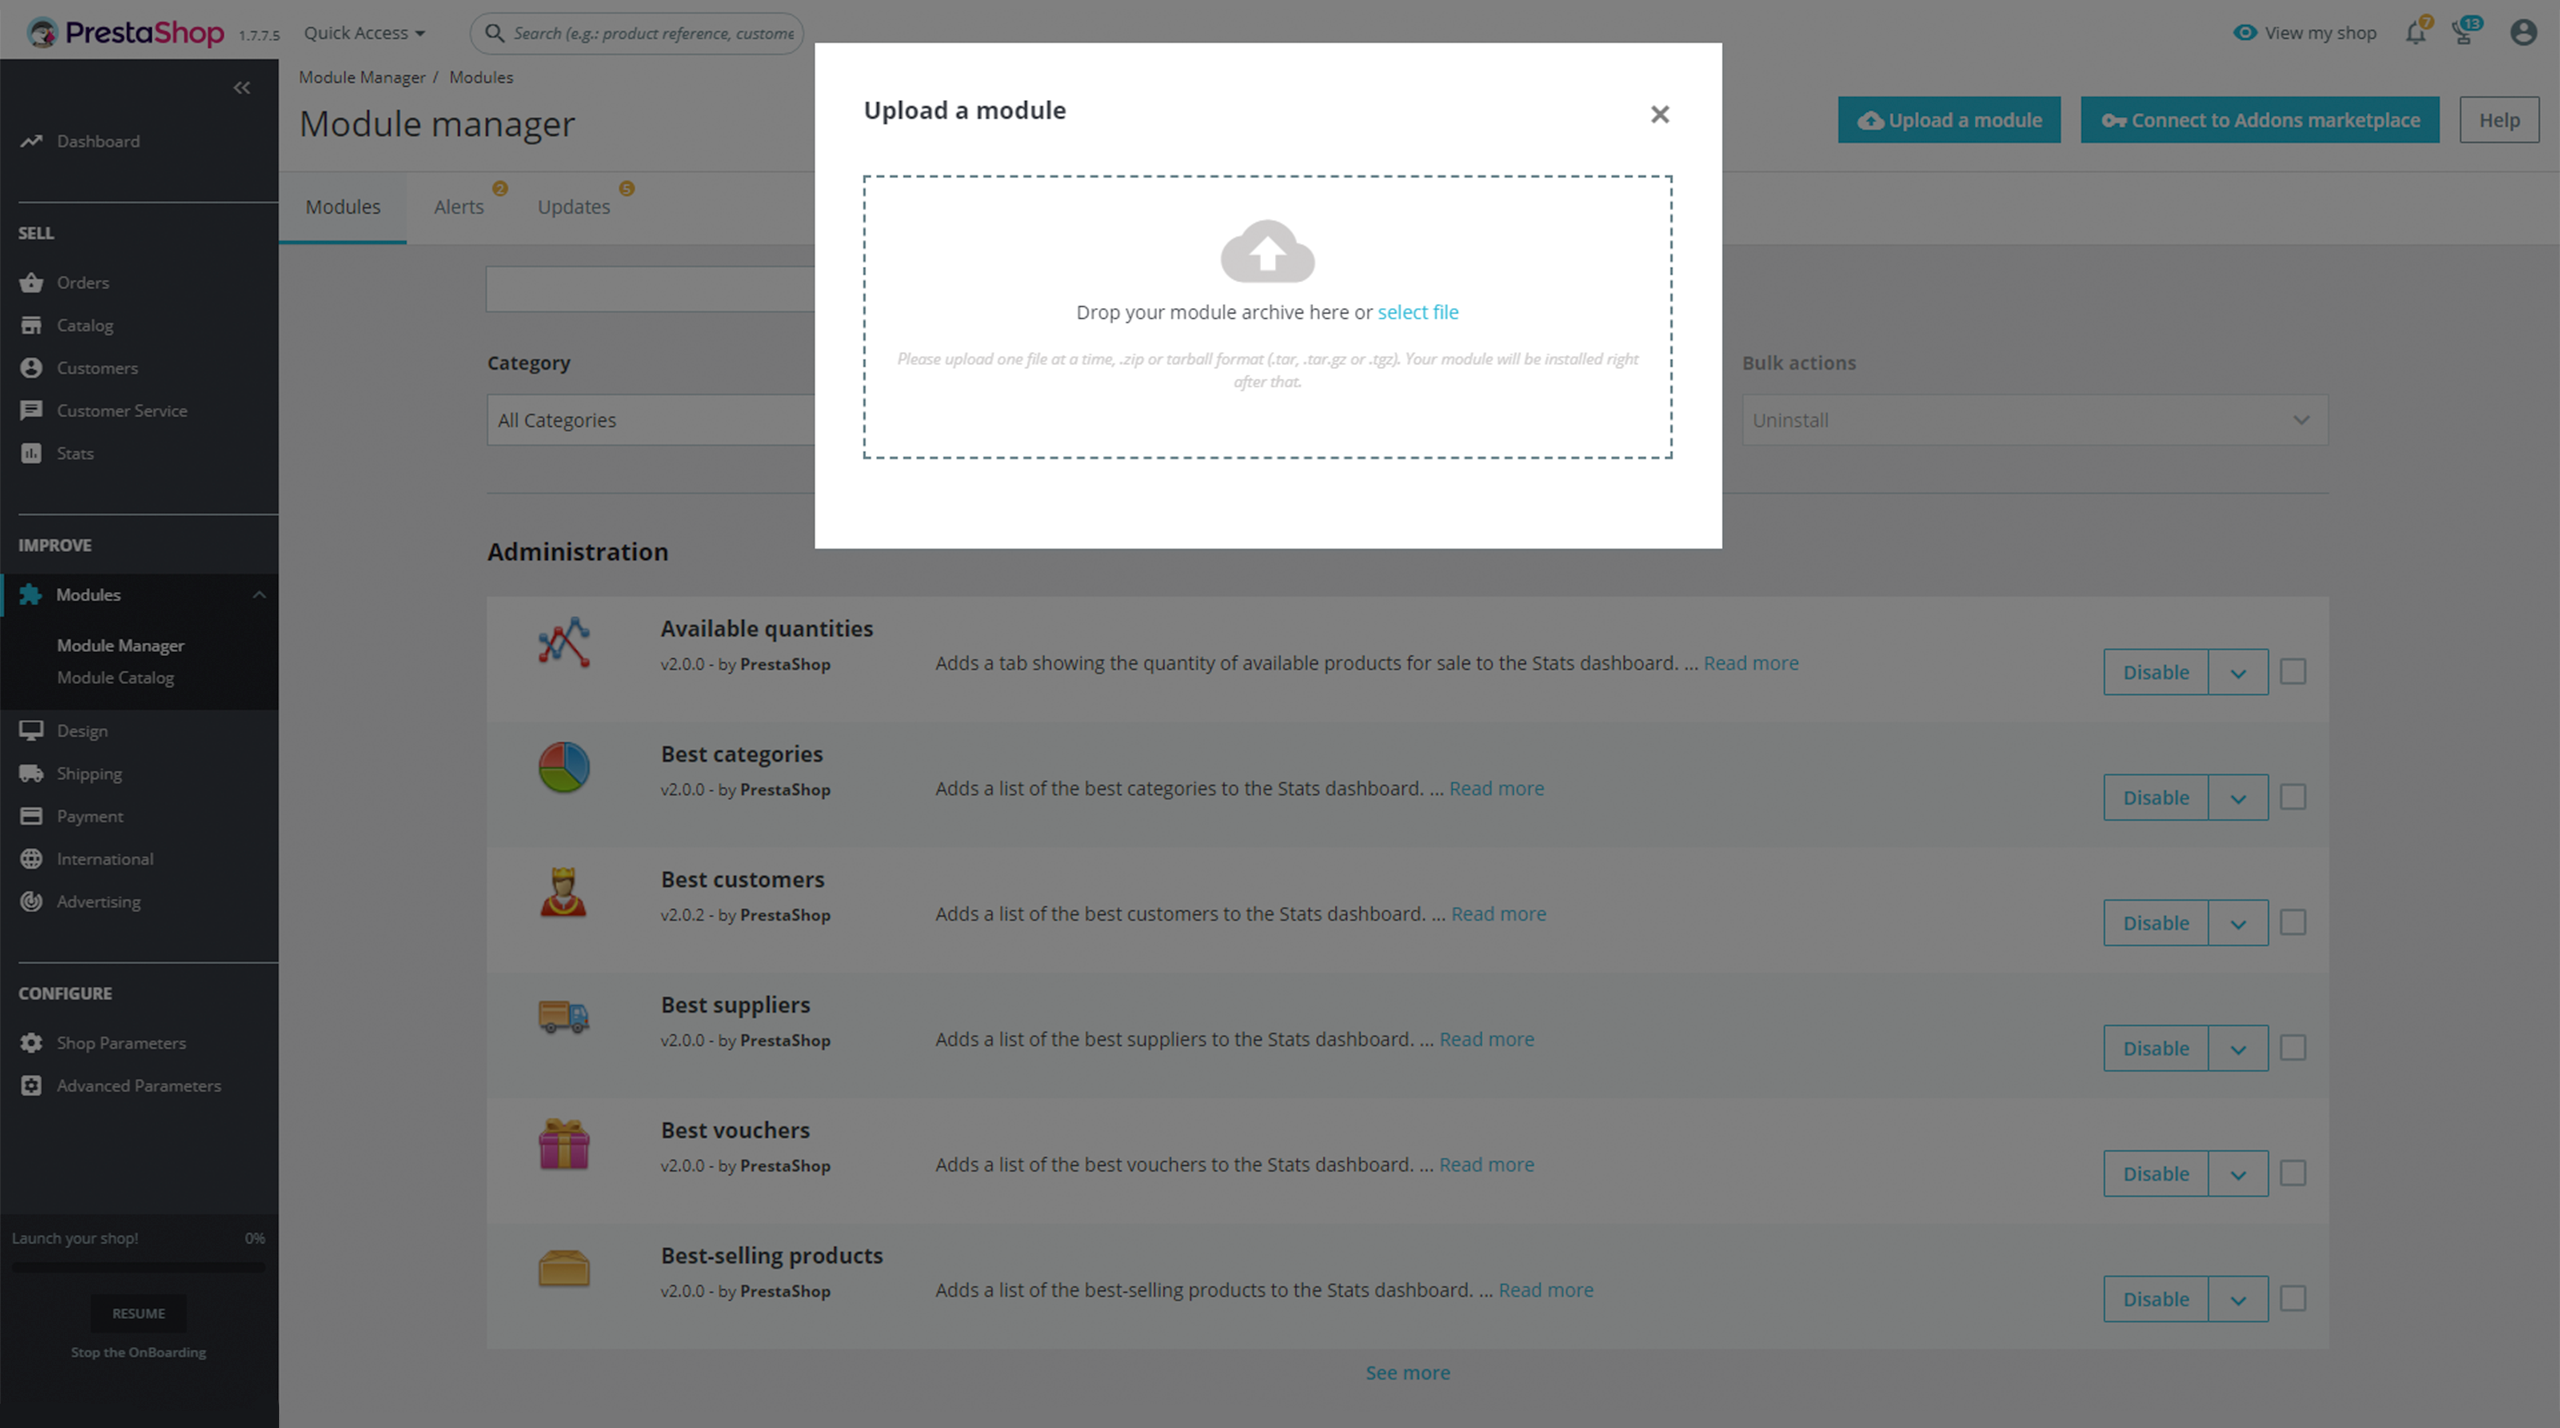
- Go to Modules -> Module Manager.
- Click “Upload Module”.
- Select the RocketFuel plugin for WooCommerce zip file that you downloaded above.
- Wait for the upload to complete.

STEP 3
Configure Your RocketFuel Merchant Account Information
- Find “RocketFuel” in the list of modules below.
- Click “Configure”.
- Login to your RocketFuel Merchant Dashboard and go the the Settings page.
- Copy your “Merchant ID”, and “Public Key” from your Merchant Dashboard into the appropriate fields in your stop’s RocketFuel Configure page.
- Copy the “Address for RocketFuel Callback” from the Configure page and save it in your RocketFuel Merchant Dashboard’s Settings.
- Click “Save”.

How to Use the JavaScript SDK

RocketFuel also provides a JavaScript SDK. Click on the button below to our repository, which includes documentation and instructions on working with the SDK.
